
Lizziebusy Handmade ETSY shop

LIZZIEBUSY TEMPLATE

LIZZIEBUSY TEMPLATE
Lizziebusy Template, sito di grafica e non solo. In vendita digital clipart su licenza, grafica per siti web, auction template, banners, biglietti da visita etc etc

Translate

Rent an appartment in Florence Tuscany Italy

Rent an appartment in Florence Tuscany Italy
Do you like to spend your vacations in Florence? This is a cute flat housed in a typical building of the 13th century at 50mt from Ponte Vecchio. Click on the picture to know more.
Visualizzazione post con etichetta gessetti. Mostra tutti i post

sabato 3 marzo 2012

Pretty girl stamping&stitching


Questo è il mini quilt che ho realizzato utilizzando i nuovi timbri di Suzi Blu.

This is the mini art quilt I did using the new Suzi Blu stamps.

mosai pretty girl

STEP 1:
Inchiostare il timbro col tampone nero STAZONE, stampare su stoffa di cotone bianco, stirare la stoffa sul rovescio, ricamare i contorni con fili da ricamo (matassina da 6 fili).

Stamp on white cotton fabric using STAZONE, iron the fabric on the back side, stitch the border lines of the stamped drawing using embroidery floss (one or two of the six threads).


STEP 2:
Invecchiare la stoffa ricamata utilizzando un pennello a spugna imbevuto nel thè. Asciugare nel forno a microonde per 3-5 minuti o nel forno normale a 50°C.
Per rafforzare l’invecchiamento, inumidire la stoffa esternamente al ricamo con il pennello a spugna e spargere dei grannelli di caffe istantaneo che saranno sciolti  con una leggera pressione del dito.

Tea dye the embroidery using a sponge brush with tea. Dry into the microwave oven for 3 to 5 minutes or into a standard over at 50°C.
To improve the vintage look, use small grains of instant coffe spreaded with the finger all around the embroided figure on the wet fabric.
STEP 3:
Costruite il vestito con pezzi o strisce di bustine del thè usate e colorate con colori acrilici molto acquerellati.
Build up the dress with pieces or stripes of used tea bag colored with an acrilic wash.


STEP 4:
Colorare lo stitchery con i gessetti colorati, utilizzando i cotton fioc e sfumando il colore. Fissare il colore con la finitura spray. Lasciare asciugare. Trapuntare con macchina da cucire in free motion embroidery il vestito disegnando due fiori grandi. A piacere trapuntare anche altre zone con cuori o piccoli cerchi.

Color the stitchery with chalks, blending the color with Q-tips. Fix the color with a finishing spray. Let dry. With the sewing machine free motion embroider the dress with big flowers and all around the stitchery with small circles or hearts.



sabato 25 settembre 2010

Cornice con passepartout stitchery

img033

Ho sfruttato il disegno che avevo preparato per le etichette quilt  “Mille Colori” per l’iniziativa di Roberta Sperandio per i bambini dell’Aquila. L’ho trasformato in un passepartout per una cornice. Ho ricamato il disegno, colorato con i gessetti e dietro ho incollato del feltro blue per renderlo più rigido.

I have  used the drawing I prepraed for the quilt label “Mille Colori” dedicated to the children from L’Aquila, organised by Roberta Sperandio. This time it comes out a passepartout for a frame. I stitched the drawing, colored with chalks and on the back side I glued some blue felt.

giovedì 5 agosto 2010

Ricettario molto country

Mi sono ispirata al pattern di Terrye French Chicken in a Basket, dospinibile nell’ambito dell’iniziativa Painting with Friends. Fatevi un giretto in questo nuovo blog http://paintingwithfriends.blogspot.com/e troverete un sacco di bella pittura country prim. I disegni sono tutti di Terrye French ma realizzati da altrettanto bravissime pittrici. Chicken in a Basket è stato dipinto da Sharon Bond.

I  got inspired by the Chicken in a Basket  pattern by Terrye French, belonging to  Painting with Friends patterns. Just go around this blog http://paintingwithfriends.blogspot.com/ and you will find a lot of country prim paintings. All the drawings are from Terrye French but they are realised by other very talented painters. Chicken in a Basket is painted by Sharon Bond.

H0 utilizzato il disegno di questo pattern per realizzare uno stitchery che diventerà la copertura di un quaderno ad anelli per le ricette.

Ho usato la solita procedura, ricamo, stoffa invecchiata col caffè solubile e colore con i gessetti.

I used the lineart of this pattern to make a stitchery that will become the cover for a recipe book.

I used the same method, as usual:  to embroider the line art on the fabric,  to coffee dye the embroidered fabric and to color the stitchery with chalks.

img018

Per realizzare lo sfondo, simile all’originale, ho usato una mascherina per stencil e i gessetti.  Risultato soddisfacente direi. Poi ho terminato con una finitura spray di protezione.

To make the backgroud similar to the origibal pinting I used a stencil mask and chalks.  That’s turned out nice, I would say. At the end I protected the colored stitchery with  a spray sealer.

E questo è l’originale……..

And this is the orignal painted piece……..

ebay_chicken_in_a_basket_sb


sabato 17 luglio 2010

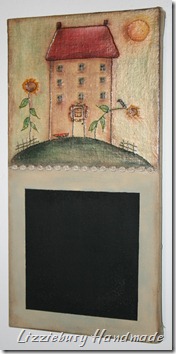
Stitchery on canvas

Una variante per la tecnica stitchery on canvas…………

IMG_6128

Lo stitchery on canvas è una tecnica che mi sono inventata prendendo spunto dal decoupage. Si utilizza una tela liscia, si ricama un disegno prim con i semplici punti di ricamo utilizzati per lo stitchery, si colora e si incolla la stoffa su una tela da pittori. Per ottenere l’effetto cerato si utilizza una vernice trasparente all’acqua per proteggere la stoffa e poi un gel all’olio (tutti prodotti utilizzati per la finitura del decoupage).

La novità di questo progetto è l’utilizzo dei gessetti per il colore di fondo con un bell’effetto shabby e polveroso……………….

IMG010  Disegno di Terrye French

ma anche l’uso degli acrilici con la tecnica dry brush per la cornice e la vernice lavagna per il quadrato nero. Ultimo tocco, il nastrino di spago lavorato per coprire la fine della stoffa.

lunedì 5 luglio 2010

Lizzie loves gingers

IMG005

Il disegno “gingerbread kisses” è di Deb Richey, tratto dal libro che ha fatto insieme a Terrye French “Thrift shop treasures & a little more”. Questa volta niente pennelli, solo ago filo e gessetti, una ……

Se cliccate su Prim Stitchery Tutorial sulla parte alta del blog vi comparirà una pagina, ancora in costruzione, che userò per raccontarvi di stitchery e colore. Userò proprio questo disegno come dimostrativo.

Come sempre se avete domande, curiosità, suggerimenti, scrivetemi e se volete toccare con mano venite a Settembre a Montepulciano da Piccole Passioni per un tranquillo week end di corsi di  stitchery!

The “gingerbread kisses” is from Deb Richey and it comes from the book “Thrift shop treasures & a little more”, written together with Terrye French. But this time no brushes, only needle, threads and chalks……..

If you click on Prim Stitchery Tutorial on the upper part of the main blog page, you will find a page, still in progress, that I use to tell you some more about stitching and coloring. I will this patter to demontrate the tecnique.

As usual, feel free to contact me if you have any questions, curiosty or suggestions and if you like to learn stitchery face to face, come to Montepulciano in September at Piccole Passioni for a nice and quite stitchery classes week end !

sabato 9 gennaio 2010

Un libriccino porta aghi, a needle book

img002

Ecco il primo progetto per i kit stitchery del 2010. E’ un libriccino di stoffa porta aghi/porta fili. Quella che vedete è la copertina. Lo sfondo è stampato su stoffa, il disegno è stato ricamato e poi colorato con i gessetti.

Here it is my first stitchery kit project for the 2010. it is a needlebook. The cover is shown, The flowered background has been printed on the fabric, the pattern has been stitched and colored with chalks.

Il pattern è di Chestnut Junction da cui ho avuto da poco  l’autorizzazione per utilizzare i suoi prim patterns nei miei stitchery kit con la stoffa pre-stampata

The pattern is by Chestnut Junction  from whom I got the licence to use her  prim patterns for my stitchery kits with pre-printed fabric. 

E questo è l’interno realizzato con lino tinto nel the e delle sagome realizzate  in feltro e tagliate con la Sizzix.

And here it is a look to the internal side that has been realised with tea dyed linen and felt shapes cut with Sizzix-

img003

giovedì 16 aprile 2009

Di Renee Mullins, ma non è pittura country

Ho voluto provare a fare qualcosa di diverso con i disegni di Renee Mullins. Questo è il suo ultimo pattern free:  ovviamente l’ho ricamato e poi colorato con i gessetti. Mi sono innamorata di questa tecnica dei gessetti!
 
Lo dedico ad ERIKA che adora Renee!
 
Per la tecnica dei gessetti leggete qui….. i gessetti, chiamati anche pastelli morbidi o soft pastel si trovano nei negozi di belle arti….i miei li ho trovati per caso da un falegname
 
I tried something special with Renee Mullins drawings. This is one of her last free pattern: I stitched it, of course, and then colored with chalks. I’m really getting very very fond about chalks tecnique!
 
It’s dedicated to ERIKA, who loves Renee soooooo much!
Coloring with chalks is explained here, chalks or soft pastel are on sale at art shops, I found mine by chance at a wood store….
 
Questo è il ricamo prima del colore:
 
This is the stitchery before coloring it:
 
plumpurdy stitchery

Ne farò un cuscino, appena la mia macchina da cucire trova un minutino….

It will be a pillow, as soon as my sewing machine has some time for me……..

martedì 31 marzo 2009

Uovo e gessetti, prova di colore

Nuovo esperimento con i colori

grafica di Tammy Deyoung

Tempo fa ho acquistato due scatole di soft pastels da 50 gessetti l’una della Marie’s, made in Shangai, ovviamente. Una scatola ha tutta la palette di colori, l’altra solo colori tenui, tipo terre. Eccoli qua:

Maries50SPSet

Io adoro tutte queste sfumature di colore e quando le vedo impazzisco proprio. Li ho acquistati pensando che fossero altro, pastelli a olio, credo, e poi me li sono trovati tra le mani, non sapendo proprio come utilizzarli. Partecipando al giveaway di Annie Quilt di Brenda ho letto che aveva colorato gli stitcheries con i gessetti, chalk, in inglese. Non avendo trovato nessuna descrizione di questa tecnica, mi sono inventata il processo e l’ho sperimentato. A voi il giudizio!

Mi piace l’effetto polveroso dei gessetti!

Materiali:

- gessetti

- cotton fioc

- spray protezione per carboncino o acrilico trasparente spray

Prelevo il colore dal gessetto strusciando con il cotton fioc e riporto quindi il colore sulla stoffa strusciando con movimenti circolari dall’esterno all’interno del ricamo. Si parte dallo sfondo chiaro e si sfuma con colori più scuri. Si possono utilizzare tre colori per ogni area, due della stesso colore di sfumatura chiara e scura e l’altro di una tonalità marrone per le ombre. Se si vuole un colore più deciso, su superfici ampie, si passa direttamente il gessetto sulla stoffa. Se il colore è troppo scuro si ripassa con la tonalità più chiara.

Una volta finito di colorare il ricamo si spruzza con con lo spray acrilico trasparente

Some tips how to color stitcheries with soft pastels or chalks:

Materials:

- chalks or soft pastels

- cotton swabs (Q-tips)

- spray acrylic matte

I get the color from the chalk using a cotton swab then I smoothly touch the fabric like to dust it with chalk and apply the color with soft and circular motion. Choose about three colors for each area to blend together to give a nice shaded effect. Typically a light color, darker color of the same shade, and brown tone. Focus mostly on the edges of the object you are chalking or just one side of the object and blend inward with your soft circular motion, beginning first with your light shade, adding a touch of your dark shade and then highlighting with your brown. If you think it is too dark, blend the light colors back in. I spray my stitchery with an acrylic matte spray after chalking